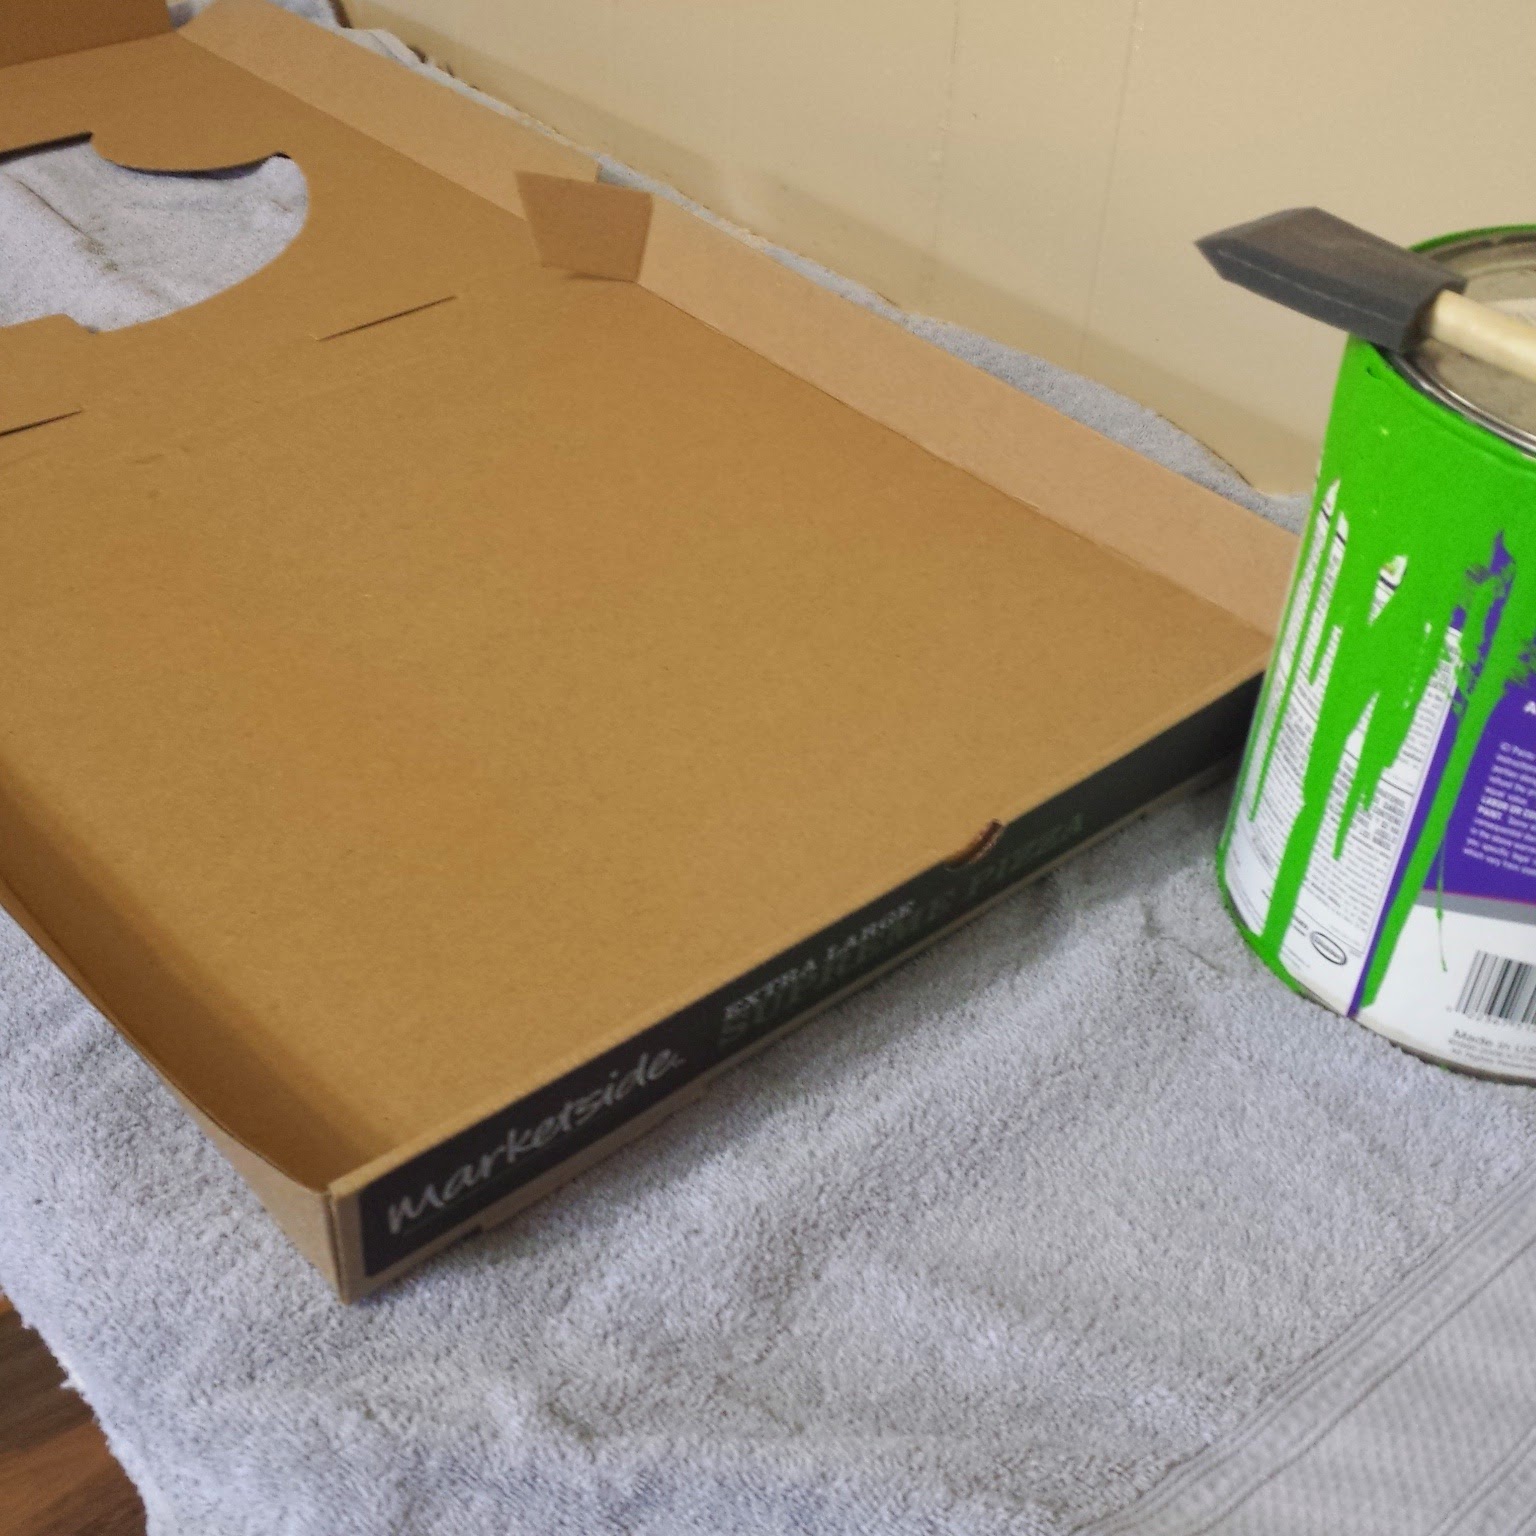
Portable Mini Green-Screen....
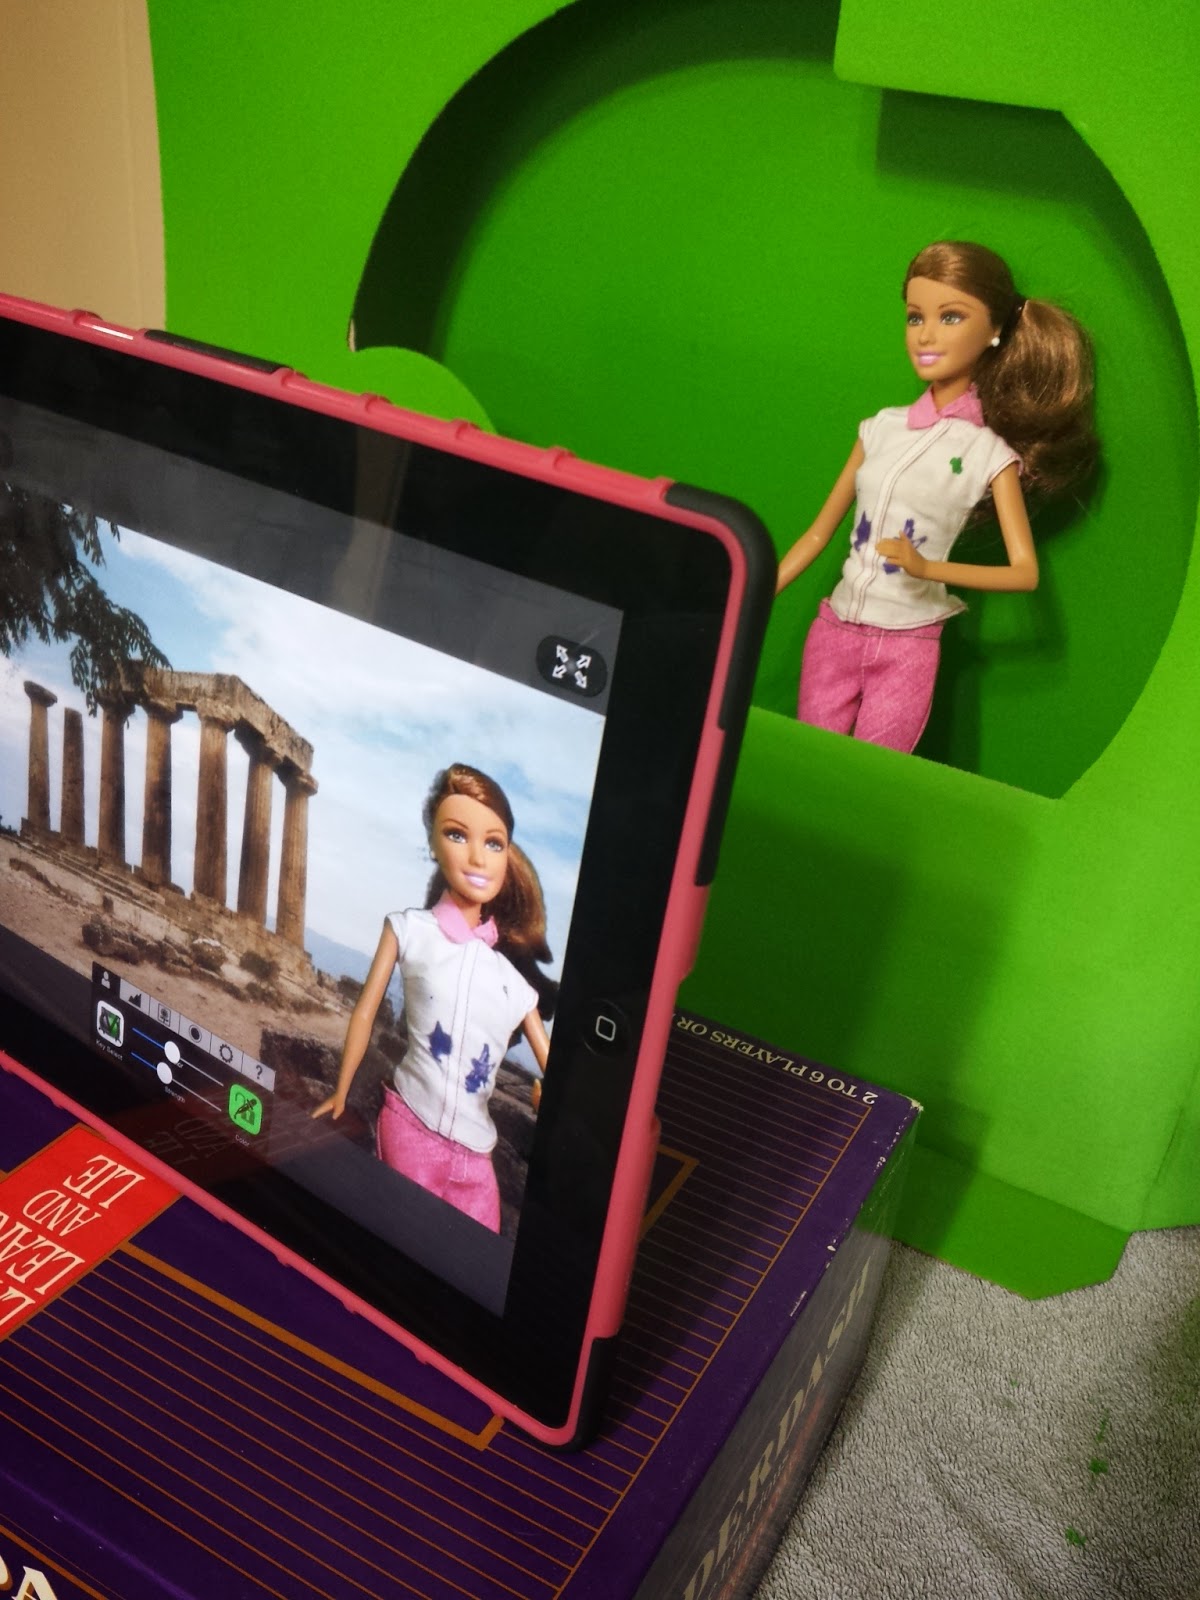
One of the projects I like to do with my 6th grade students is "On the Scene Reporter". I have a wall in my classroom painted green, for our staging area that I normally use for this project. My students are normally the reporter giving a report on Ancient Greece. Since this will be my 3rd time doing this project I have to switch it up just a little. I've been planning a workshop for teachers on Green-Screen projects and it hit me how I could switch it up and still be a green-screen project, I need portable mini green-screens. It just happened to be Super Bowl day and we just happened to have gotten some extra large pizzas from the store so I had a few boxes to play with. Since the pizza boxes had a window I decided to paint the inside and the back of the box, this way I could use both sides. I could use the box as a regular green-screen or flip it and have a puppet show / animation stage green-screen style.
 |
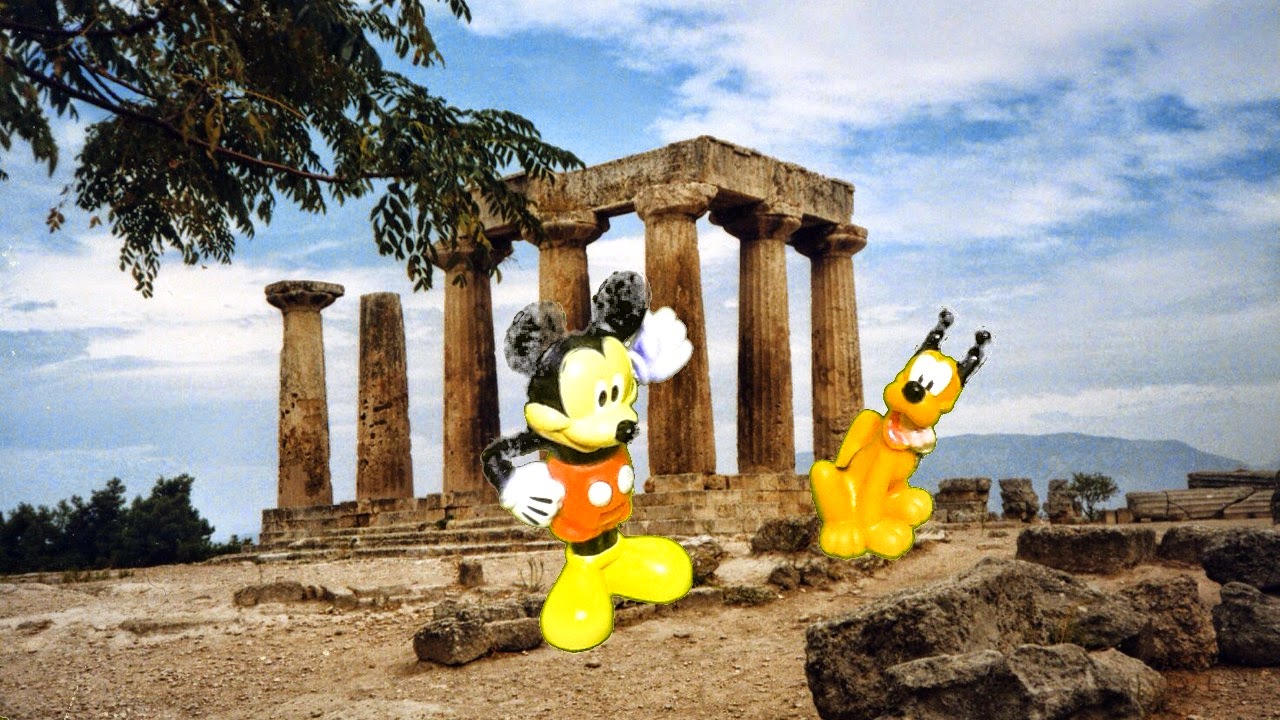
| Puppet Show / Animation Stage |
I choose a pizza box because it is flatter and can stand up by itself. Which will make it easier to travel with and to store. As I played around with the box and the green-screen app Veescope I did noticed that you had to be careful with lighting and shadows. I also noticed that some of my props or actors were a little on the short side so I took another box and painted it green to make a platform for them to stand on. My little actors can now blend in better with the background image or video.
One of the reasons I decided to create a mini green-screen was because I have a few students who love Legos and I know they would create some amazing stories using green-screen and their Legos. I also have a few shy students who refuse to stand in front of a camera and give a report. Having a mini green-screen would give them an option to still do the project but use an actor to replace them as the reporter. They would still have to add their voice either at the time of recording or overlay it with the iMovie app. Either way it is a win, win situation. My students are now not only the reporter but now they can be a director, producer, casting director, writer, and agent.
 |
| Paint a smaller box for a platform. |
Having a portable mini green-screen would also allow my students to record anytime and anywhere. Giving them a choice on how they can do their green-screen projects opens the door to their creativity.
Project Ideas:
- On the Scene Reporter
- Puppet Show
- Book Trailer / Report
- Use Paper Dolls / Print out of famous people & make them move and tell their story.
- Wear a Green Glove and Make the Actors Move
- Paint Bamboo Skewers Green and Attach them to the Props & Actors to Make Them Move
- Use Explain Everything and work out a math problem. Use that recording as the background in the Veescope app and have your actor explain how they solved the problem.
- Have a time lapse video of a plant growing, science experiment, etc... saved into the Veescope app as the background. Then have your actor explain the process.
- Create Postcards of places your actors saw while on their Dream Vacation.
Tips:
- Paint smaller boxes and use them as platforms for your props and actors.
- Use an iPad stand to position your iPad just right for recording.
- Record or snap stills in a well lit area or use a desk lamp with a bendable neck to provide lighting.
- Record in a quiet place.
- Save images and or video clips to the iPad that has the Veescope app.
- Use the Full version of the Veescope app.